Sunday, June 30, 2013
Christmas Door Decor-better late than never :)
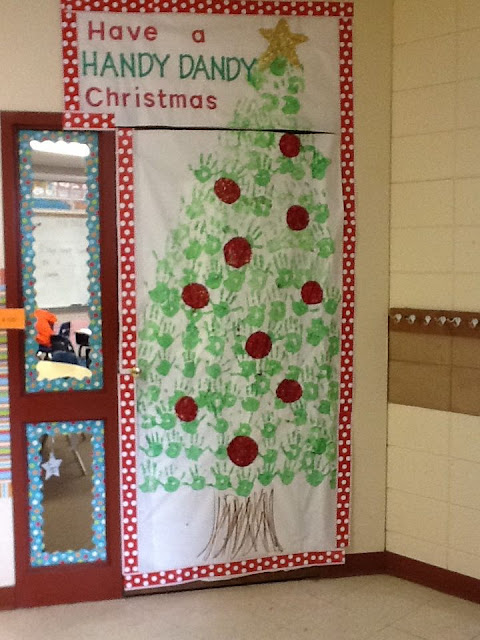
Yes, it is June, tomorrow is July, and Christmas was 6 months ago...let's just say this is close enough to be a 'Christmas in July' post :) Working at an elementary school can have its perks-one of the perks is Christmastime! Holidays bring out the creativity in many of us teachers and for our school, we had a little too much fun with our Christmas!! Our math coach came up with the idea of having each class decorate their doors for Christmas. And of course, with the competitive perfectionist nature in us all, it quickly became a time for us to all try to outdo the others! One night we were even up at the school til after 7:00 having fun decorating. The doors were a blast for us-they ranged from us coming up with our own ideas, to having kids create the doors, to the kids creating the idea for the door and then the teachers doing them. Many of the kindergarten classes colored pictures and those were displayed on the door. Some classes put up paper and let the kids have total artistic control over what they used to express their Christmas Spirit. It was so much fun and a great way for us teachers to have great memories of the season! Below I have posted the pics of the doors we proudly displayed!!
Chevron Love
 It's been several months since I have posted last, so I will try to spend the next couple of days playing catch up. One project I made a while back is one of my favorite since I have a current Chevron love and you know I have to share ;) this door decor is super cute and the best part is the ease and speed to make it. It took an hour from start to finish to make this hanging.
I started with the letter S-from Hobby Lobby-@ $3. I wanted to paint it red so that's why I started here-so it would have time to dry. I found some cute gray and off white chevron pattern fabric and a 16x20 canvas - both from HL. Hardest part was lining up the pattern on the canvas. I laid the canvas face down on the fabric and got out the trusty staple gun. I pulled the top and bottom tight and stapled them. After doing this, you will be able to fold and tuck the sides of the fabric to show a good clean edge before stapling the sides. I stapled a ribbon on the top-make sure you cut the ribbon according to how low or high you want it to hang in your location. The last part was gluing on the letter S. I used E6000 glue for this because it is virtually indestructible!! I positioned the letter where I wanted it and then I carefully flipped the whole canvas (while holding the letter in place) so that I could put some weight on the back to help it hold in place. I just used a heavy glass and out it in the center of the letter for the extra weight. I could have done this without flipping it all over, but I was worried the extra weight might cause the fabric to slack and I wanted the letter to hang and still be taut.
That's it!! Super easy and went straight to my front door!
Subscribe to:
Posts (Atom)


